The first thing we did on our first project meeting was having a look at the BOM. What components do we need to build this automatic magnetic loop tuner, and are they easy to find.
It seemed Loftur did a great job listing all the parts and most of them could be ordered at DigiKey, Mouser or eBay. It would be only later in this project I found out huge savings could be done if some parts were ordered at AliExpress.
I was soon appointed as logistics manager and started sourcing and ordering all the needed parts.
Following parts are worth to spend a few words on:
LCD screen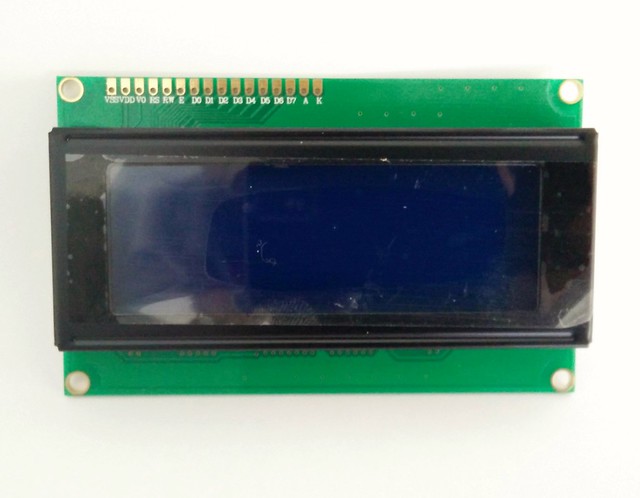
If there is only one item of this project you should buy on AliExpress, it’s this 20x4A LCD display. Using the search function you can easily find this screen for less than $3. For Europeans, it can be even more advantageous when the exchange rate of the dollar is low. You can pick the one without the IIC/I2C Serial Interface Adapter Module as for this project you won’t need it. Link to item on AliExpress.
Stepper motor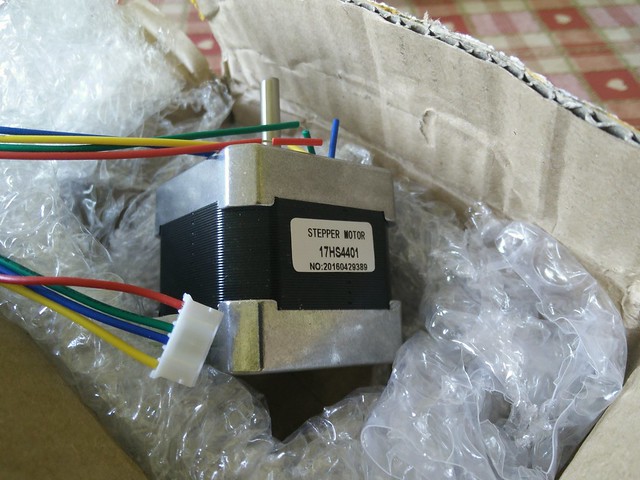
My advice is to buy the motor only when you know what type of capacitor you’ll use for your magnetic loop antenna. For an air variable capacitor, you might need extra resolution, for a vacuum variable capacitor you might need extra torque. Both can be achieved by using a stepper motor with a reduction gear. However, be careful with to much torque, you might end up damaging your vacuum capacitor if your end stop settings are not set correctly. Link to item on AliExpress.
Stepper motor driver chip/module
Here you have several options. Option one is Allegro since it is this IC that Loftur’s used in his electrical diagram and PCB design. However, there are two other options to make the stepper motor do its magical micro-stepping. The A4988 and the DRV8825. Loftur wrote the code in such a way it can be easily modified to take into account the type of ic or stepper module you are using. You only need to comment and un-comment some lines of code and recompile.
Screen bezel
If you want your automatic magnetic loop tuner to be a nice looking piece of equipment, this screen bezel is a must. Strangely enough, there seems to be only one manufacturer in the world who can provide these little simple, plastic and Lexan, screen bezels. At 3,5 dollar each, they are not expensive, but the shipping costs will make you think twice. On top of that, it’s coming from the USA, which is a huge red flag for the Belgian Customs, who are very keen on making sure you pay your import duties. In the end, more than 50% of the total cost is the tax. Not only because of the 21% VAT but especially due to the flat rate of 12 euro in “handling cost”.
*UPDATE*: this manufacturer disappeared from the internet, and is not answering his emails, so it’s not possible to order these anymore
**UPDATE** And he’s back: http://www.dhmicro.com/plastic.html
PBC by Loftur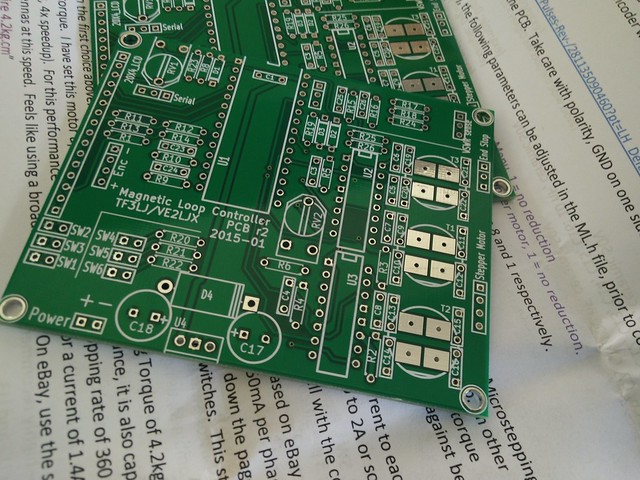
As none of the three of us wanted to etch the schematics on a copper prototype board, we just ordered the 5 first controller PCB via Loftur.
Later I made my own version of the PCB.
SWR bridge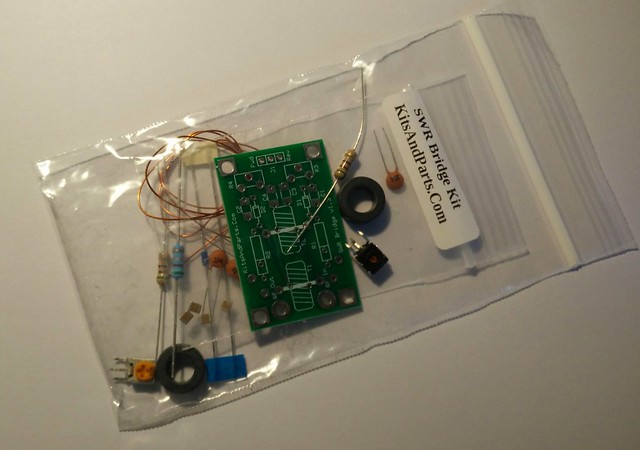
In the beginning, you want to be sure, that what you are making will work. So to play on the safe side, you copy what others have been done before. To incorporate the SWR auto-tune function into the automatic magnetic loop controller, Loftur proposed to use an SWR Bridge kit from KitsAndParts.com and make some adjustments to it. So that’s what we did for the first automatic magnetic loop controllers. Later I made my own PCB’s based on the Sontheimer Bridge design. You can read that story here.
Rotary encoder
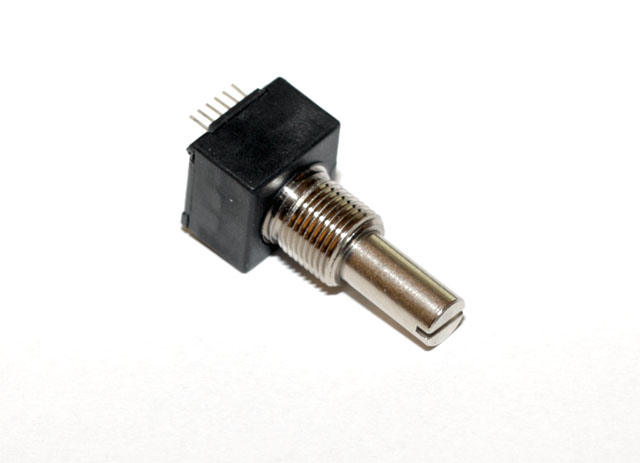
We all know rotary encoders and we love them. It’s the big round knob on our radio we like to spin around to scroll over the band to spot that new DX or SOTA. For the magnetic loop controller, you can’t just use any encoder. It has to be an encoder that has sufficient resolution to be usable for this project. In some configurations, each encoder pulse is equal to a 1/8 step, so if your capacitor needs to be adjusted a few steps, you’ll have to turn the knob several times around if it has not enough pulses per rotation. We are using an encoder with 64ppr, Loftur is using a 128 encoder in his automatic magnetic loop controller. Cheaper 400 ppr alternatives can be found on AliExpress, but you have to take into account the much bigger size. More detailed info here: Rotary Encoder.
Teensy 3.2
This little Arduino compatible device is the hart of the automatic magnetic loop controller. It is where the processing power and memory storage is coming from. They cost about the same as the rotary encoders. If you are lucky you can find cheaper compatible devices on AliExpress, but then you are not sure if they will work. As a matter of experiment, I bought two and they seem to be doing the job fine. You can save a few euro if you buy the Teensy version without the pins already attached. Soldering 28 pins can be done in two minutes, and since we are soldering anyway, why wouldn’t we do this ourselves?
Previous Chapter: Automatic Magnetic Loop Tuner – The Beginning
Next Chapter: Automatic Magnetic Loop Tuner – Soldering Components

The screen bezel is available again:
http://www.dhmicro.com/plastic.html at $3-50